
Table of Contents
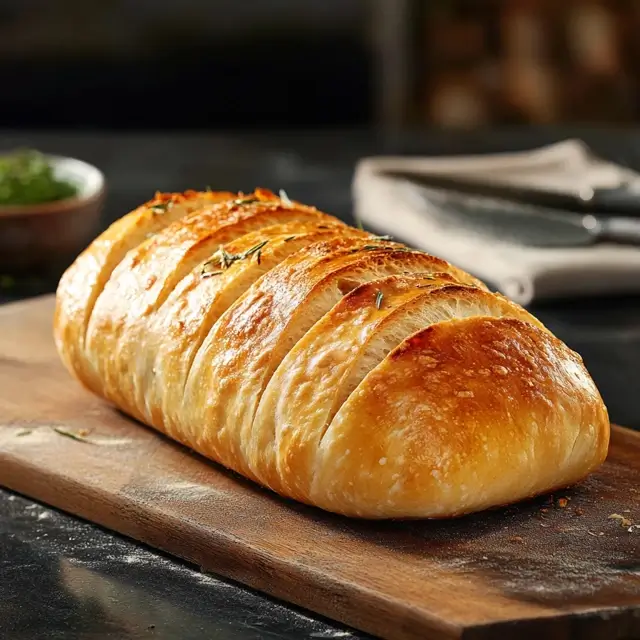
Le pain au levain est bien plus qu’un simple produit de boulangerie : c’est une tradition intemporelle, un art et une science transmise depuis des siècles. Contrairement au pain au levain commercial, le pain au levain repose sur une fermentation naturelle, créant une profondeur de saveur et une texture véritablement uniques. Chaque pain raconte une histoire de patience, de savoir-faire et d’alchimie naturelle entre la farine, l’eau et le temps.
Whether you’re a beginner or an experienced baker, understanding sourdough is a journey of discovery. From nurturing a lively starter to mastering fermentation and baking techniques, every step contributes to the final masterpiece. But beyond technique, sourdough offers something deeper—connection. It connects us to ancient baking traditions, to the simple pleasures of homemade food, and even to a growing community of bread enthusiasts worldwide.
In this guide, we’ll explore everything you need to know about sourdough—from the basics of ingredients and fermentation to troubleshooting common challenges and enhancing flavor. By the end, you’ll have the confidence to craft delicious, artisan-quality bread in your own kitchen. Let’s embark on this journey into the world of sourdough, where science meets artistry, and every loaf is a labor of love.
1. Sourdough Bread: Not Just a Loaf
Sourdough bread is not just a loaf—it’s an experience, a labor of love, and a dance between science and art. But what exactly makes a sourdough loaf exceptional? The secret lies in a combination of quality ingredients, precise techniques, and a deep understanding of fermentation. Let’s dive into the details to uncover the magic behind great sourdough bread.
2. Understanding the Basics of Sourdough Bread
2.1. What Makes Sourdough Bread Different from Regular Bread?
- Unlike regular bread, sourdough relies on natural fermentation instead of commercial yeast.
- Flavor Profile: The natural fermentation creates lactic and acetic acids, giving sourdough its characteristic tang.
- Texture: Proper fermentation and gluten development result in an open crumb and elastic chew.
2.2. Le rôle de la fermentation dans le levain
Fermentation is the backbone of sourdough. It’s the process where wild yeast and bacteria (primarily lactobacilli) consume sugars in the dough. This not only leavens the bread but also creates its signature flavor.
📝 Fun Fact: The longer you ferment your dough, the more pronounced its tangy flavor becomes.
3. Ingredients: Choosing the Best for Superior Sourdough
3.1. Why High-Quality Flour Matters
Flour is the foundation of your sourdough. Opt for unbleached, high-protein flours like bread flour or whole wheat.
- Pro Tip: Experiment with rye flour for a richer flavor and a boost in fermentation activity.
3.2. Water: More Important Than You Think
Water quality affects the fermentation process. Tap water treated with chlorine can inhibit microbial activity. Use filtered or spring water for the best results.
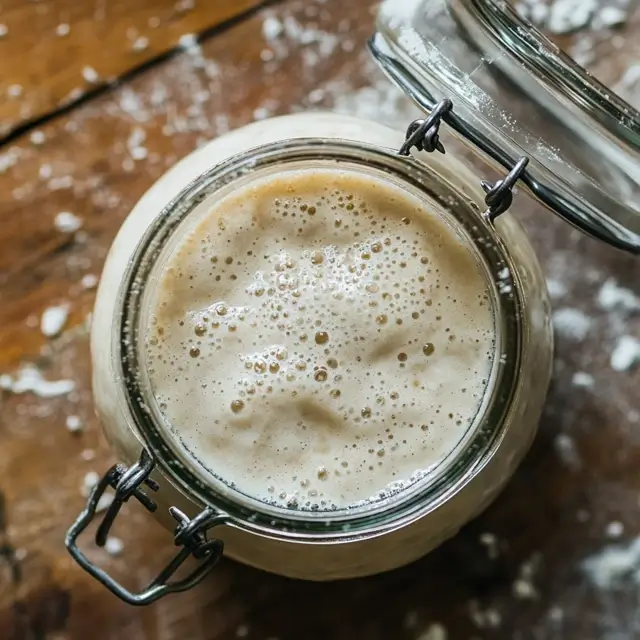
3.3. The Secret Ingredient: The Starter
- The starter is a live culture of wild yeast and bacteria that powers sourdough fermentation.
- A healthy starter should smell pleasantly sour and have a bubbly, active appearance.
4. Mastering the Sourdough Bread Starter: The Heart of Good Bread
4.1. How to Create and Maintain a Healthy Starter
- Day 1-2: Mix flour and water. Leave at room temperature.
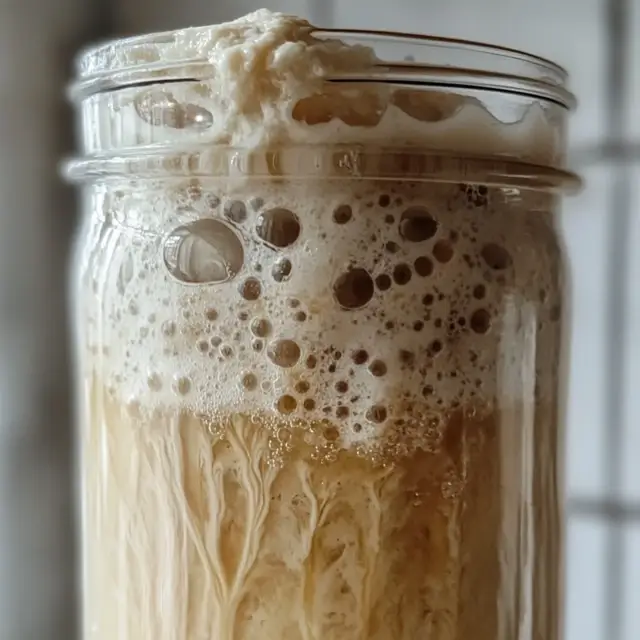
- Day 3-5: Discard half, feed the remainder. Bubbles indicate activity.
- Day 6: Your starter should double in size after feeding.
Pro Tip: Always use room-temperature ingredients for feeding.
4.2. Common Problems and Fixes with Starters
A healthy sourdough starter is the foundation of great bread, but maintaining one can be tricky, especially for beginners. If your starter isn’t rising properly, has an off smell, or seems sluggish, don’t worry—these issues are usually easy to fix. Below are some of the most common problems bakers face with their sourdough starters, along with effective solutions to get your culture back on track.
1. My Starter Isn’t Bubbling or Rising
Symptoms: Your starter looks flat, has few or no bubbles, and isn’t expanding after feeding.
Possible Causes & Fixes:
- Too Cold Environment: Starters thrive in a warm environment (70-75°F / 21-24°C). If your kitchen is too cold, place your starter in a warmer spot, like on top of the fridge, near a warm oven, or in a proofing box. You can also wrap it in a towel for insulation.
- Weak or Inactive Yeast: If your starter is newly made, it may take 7-10 days to develop strong yeast activity. Be patient and continue feeding regularly. If it’s an older starter that has been neglected, try feeding it twice a day to revive it.
- Incorrect Feeding Ratios: Make sure you’re using a 1:1:1 ratio of starter, flour, and water (by weight). Too much or too little food can slow fermentation.
- Chlorinated Water: Tap water treated with chlorine can inhibit yeast activity. Use filtered, spring, or dechlorinated water instead.
- Bleached or Low-Quality Flour: Use unbleached flour, preferably high-protein bread flour, whole wheat, or rye. Whole grain flours have more natural yeast and bacteria, making them great for boosting weak starters.
📝 Quick Fix: If your starter is sluggish, try a “boost feed” by adding a tablespoon of whole wheat or rye flour along with your regular flour. Rye flour is particularly effective at reviving weak starters.
2. My Starter Smells Bad (Rotten, Vomit, or Nail Polish Smell)
Symptoms: Your starter has an unpleasant odor—like rotten cheese, vomit, or acetone (nail polish remover).
Possible Causes & Fixes:
- Early Stages of Fermentation: In the first few days of starting a new culture, bad smells are common. These odors come from unwanted bacteria, which will be outcompeted by beneficial yeast and lactobacilli over time. Keep feeding your starter, and the smell should improve.
- Hunger (Excess Acidity): A very strong vinegar or acetone smell means your starter is overly acidic, which happens when it’s not fed often enough. Try feeding more frequently (every 12 hours) to balance acidity.
- Overly Warm Conditions: If your starter is kept in a very warm place, fermentation speeds up too much, leading to excessive acid production. Move it to a slightly cooler spot.
- Incorrect Hydration: If your starter is too watery, it may encourage the growth of unwanted bacteria. Make sure you’re maintaining the proper 100% hydration ratio (equal parts flour and water by weight).
📝 Quick Fix: If the smell is overwhelmingly bad, discard all but one tablespoon of starter and feed it with fresh flour and water. Switching to whole wheat or rye for a few feedings can help stabilize the microbial balance.
3. My Starter Has Liquid (Hooch) on Top
Symptoms: A layer of dark or clear liquid has formed on top of the starter.
Possible Causes & Fixes:
- Underfeeding: Hooch is a sign that your starter is hungry. It forms when the yeast has consumed most of the available food. Stir the hooch back in (if it doesn’t smell too strong) and feed the starter, or pour it off if the smell is unpleasant.
- Too Much Hydration: If your starter is very watery, try reducing the amount of water slightly to create a thicker consistency. A thicker starter ferments more slowly and evenly.
- Warm Environment: If your kitchen is warm, your starter may ferment too quickly and produce hooch more frequently. Keep it in a cooler place if this happens often.
📝 Quick Fix: Feed your starter more frequently (every 12 hours) until it stabilizes. If hooch appears frequently, consider keeping your starter in the fridge and feeding it weekly.
4. My Starter Has Mold or Pink/Orange Streaks
Symptoms: There are visible mold spots, or the starter has turned pink, orange, or red.
Possible Causes & Fixes:
- Contaminated Jar or Utensils: Always use clean jars, spoons, and hands when handling your starter. Old food residue or bacteria can introduce mold.
- Irregular Feeding: A neglected starter is more likely to develop mold. Feed your starter consistently to keep it healthy and acidic enough to prevent unwanted bacteria.
- Too Much Exposure to Air: If your starter is exposed to airborne contaminants, mold can develop. Keep the lid loosely covered with a cloth or plastic wrap but not fully airtight.
📝 Quick Fix: Discard the starter completely if you see mold or pink/orange discoloration. Mold can produce harmful toxins, and it’s not worth the risk to salvage. Start a new batch with fresh flour and water.
5. My Starter Rises and Falls Too Quickly
Symptoms: The starter peaks and collapses within a few hours instead of staying active.
Possible Causes & Fixes:
- Overactive Yeast: A very warm environment can speed up fermentation too much. Move your starter to a slightly cooler place to slow it down.
- Too Much Starter, Not Enough Flour: If you’re keeping too much starter and not feeding it enough fresh flour, it will rise and collapse quickly. Try using a smaller amount of starter and feeding with a higher ratio of fresh flour and water (1:2:2 ratio).
- Low Hydration: A thicker starter (less water) tends to ferment more steadily. Try adjusting your hydration level slightly.
📝 Quick Fix: Increase the amount of flour in your feedings or store the starter in a cooler environment to slow fermentation.
6. My Starter Doubles but My Bread Doesn’t Rise
Symptoms: The starter seems active, but when used in bread dough, the dough doesn’t rise well.
Possible Causes & Fixes:
- Weak Starter: Just because a starter bubbles doesn’t mean it’s strong enough for baking. Perform a float test—drop a spoonful of starter into water. If it floats, it’s ready. If it sinks, it needs more feeding.
- Not Enough Fermentation Time: Sourdough dough requires long fermentation. If your bread is dense, try extending the bulk fermentation time.
- Starter Was Used Too Soon After Feeding: The best time to use a starter is when it’s at peak rise, not right after feeding. Wait 4-6 hours after feeding before using it.
📝 Quick Fix: Feed your starter consistently for a few more days and try again. If your bread is still dense, increase fermentation time.
5. The Art of Kneading and Dough Handling
5.1. Techniques for Proper Gluten Development
Developing gluten properly is one of the key factors in achieving the ideal texture and structure in sourdough bread. Gluten is the protein network that gives bread its elasticity and chew, allowing it to trap gas during fermentation and create an airy, open crumb. Mastering gluten development requires a combination of proper mixing, resting, and handling techniques.
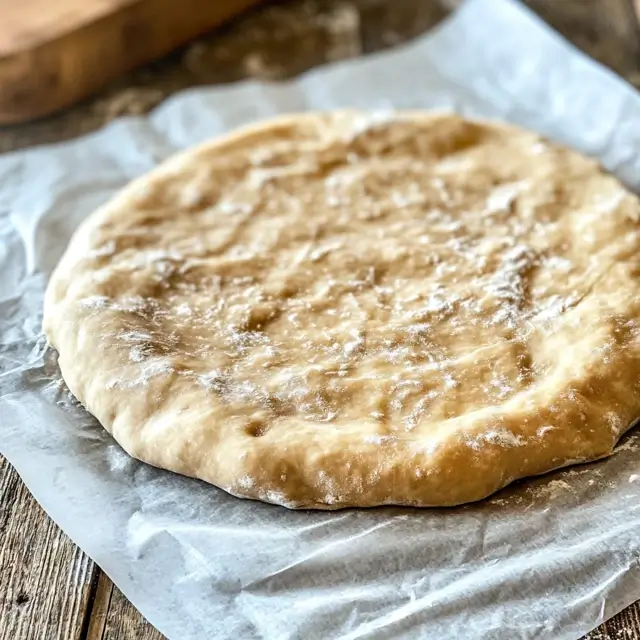
Mixing the Dough Until Shaggy
The first step in gluten development begins with mixing the ingredients until they come together into a rough, shaggy mass. At this stage, there’s no need for extensive kneading—simply ensuring that all the flour is hydrated is enough. This initial mixing allows the proteins in the flour (glutenin and gliadin) to begin bonding with water, forming the foundation of gluten strands.
The Importance of the Autolyse
After mixing, the dough benefits greatly from a resting period known as autolyse. This technique involves letting the dough sit, undisturbed, for about 20 to 60 minutes before adding salt and continuing with the kneading process. During autolyse, enzymes in the flour begin breaking down starches into sugars, while gluten starts developing naturally. This reduces the need for excessive kneading later, leading to better dough extensibility and a more open crumb.
💡 Pro Tip: A longer autolyse (up to 1 hour) is especially helpful for whole wheat and high-hydration doughs, as it improves elasticity and hydration absorption.
Stretch-and-Fold Method for Strengthening Dough
Instead of traditional kneading, many sourdough bakers prefer the stretch-and-fold technique, which strengthens gluten without overworking the dough. This method involves gently stretching one side of the dough and folding it over itself, rotating the dough, and repeating the process at intervals during bulk fermentation. Typically, 3-4 sets of stretch-and-folds at 30-minute intervals are enough to develop a strong gluten network.
Each fold enhances dough elasticity and structure, helping it hold its shape and trap gas for better oven spring. Over time, you’ll notice the dough becoming smoother, stronger, and more elastic.
💡 Pro Tip: Wet your hands slightly before performing stretch-and-folds to prevent the dough from sticking and to handle high-hydration dough more easily.
By following these techniques—shaggy mixing, autolyse, and stretch-and-fold—you ensure that your sourdough dough has a well-developed gluten structure, leading to a loaf with excellent texture, rise, and chewiness.
6. Proofing and Fermentation: Timing is Everything
6.1. How to Tell When Your Dough is Ready to Bake
- Look for a rise that’s about 1.5-2 times its original size.
- Perform the “poke test”—gently press the dough. If it springs back slowly, it’s ready.
6.2. The Importance of Temperature and Humidity
- Temperature directly impacts fermentation speed.
- Ideal Range: 70-75°F for bulk fermentation.
- Use a proofing box or warm corner of your kitchen for consistent results.
7. Shaping and Scoring for the Perfect Loaf
7.1. How to Shape Dough for Ideal Crumb Structure
Shaping ensures a tight, even surface that helps the bread rise properly in the oven.
7.2. Scoring Techniques for Beautiful and Functional Crust
Scoring allows steam to escape and controls how the loaf expands in the oven. Use a sharp blade or lame to create clean cuts.
8. Baking Sourdough: Oven Temperature and Steam
8.1. The Best Oven Setup for Sourdough Bread
- Preheat your oven with a baking stone or Dutch oven for even heat distribution.
- Bake at 450°F for optimal results.
8.2. Why Steam is Crucial for the Perfect Crust
Steam keeps the crust soft initially, allowing the bread to rise fully before hardening.
9. Troubleshooting Common Sourdough Bread Issues
9.1. Why Is My Bread Too Dense?
Causes:
- Underproofing: The dough hasn’t had enough time to rise.
- Weak Starter: Your starter may lack sufficient activity.
- Low Hydration: Dry dough doesn’t develop an open crumb.
9.2. Fixing Overproofed or Underproofed Dough
- Overproofed Dough: Gently reshape and refrigerate for a shorter proof.
- Underproofed Dough: Extend bulk fermentation or final proofing time.
10. Enhancing Flavor: The Key to Memorable Sourdough Bread
10.1. How Long Fermentation Affects Flavor
- Retarding the dough during proofing deepens flavor by slowing fermentation.
10.2. Experimenting with Add-ins
Add variety with seeds, nuts, and herbs:
- Seeds: Flax, sesame, or sunflower.
- Nuts: Walnuts or pecans.
- Herbs and Spices: Rosemary, thyme, or garlic.
11. Storage Tips for Freshness and Longevity
11.1. Best Practices for Storing Sourdough Bread
- Short-Term Storage: Use a paper or cloth bag.
- Long-Term Storage: Wrap and freeze for up to 3 months.
11.2. Can You Freeze Sourdough Bread?
Yes! Reheat frozen bread in the oven for a fresh-baked feel.
12. Health Benefits of Sourdough Bread
12.1. Why Sourdough is Easier to Digest
- Fermentation breaks down gluten and phytic acid, making it easier on the stomach.
12.2. The Nutritional Profile of Sourdough
- Lower glycemic index and increased nutrient bioavailability.
13. The Joy of Sourdough Bread: A Blend of Science and Art
13.1. Why Baking Sourdough Bread Can Be Therapeutic
The process of baking can be meditative, helping you focus and connect.
13.2. The Community Behind the Sourdough Movement
Join a global network of sourdough enthusiasts to share tips and recipes.
14. Frequently Asked Questions About Sourdough Bread
- How long does sourdough bread take to make?
- Can I make sourdough without a starter?
- Why does my sourdough taste bland?
- How do I know if my starter is healthy?
- What’s the best way to create steam in the oven?
- Is sourdough bread gluten-free?
15. Conclusion
Mastering sourdough bread combines patience, precision, and creativity. From a bubbly starter to a crusty loaf, it’s a rewarding journey that nourishes both body and soul. So, roll up your sleeves and let the magic of sourdough transform your kitchen! 🌟
For more recipes click here: https://cheifrecipes.com/why-do-my-toll-house-cookies-come-out-flat/